Mojolicious is a full fledged Perl web development framework developed by the original author of Catalyst framework. You can start building websites with it very quickly and easily. It’s a very powerful web development tool with tons of features which will enable you to build any web application. Recently, I started experimenting on it and thought would share what I have learnt so far. I will only cover the basics of Mojolicious, which should help you in getting started with this web framework.

I strongly suggest you visit the official website for in depth documentation:
Articles on Mojolicious are published with an assumption that you have basic knowledge on Perl and fundamental idea on how web pages work.
In this article, we will look at Mojolicious::Lite, a Micro real-time web framework(as it’s author puts it). It’s a light weight domain specific language built around Mojolicious. This can be used for your tiny one page projects. We will cover the following topics in this blog:
- Installation of Mojolicious
- Building a simple “Hello World” app with Mojolicious::Lite
- Testing
- Deployment
Installation
There are 2 different methods to install Mojolicious. You can chose whichever method you find convenient:
Method 1
Installation of the powerful Mojolicious framework can be achieved using only a single-line command. Open the terminal in your server and run the below command:
curl -L https://cpanmin.us | perl - -M https://cpan.metacpan.org -n Mojolicious*source: https://mojolicious.org
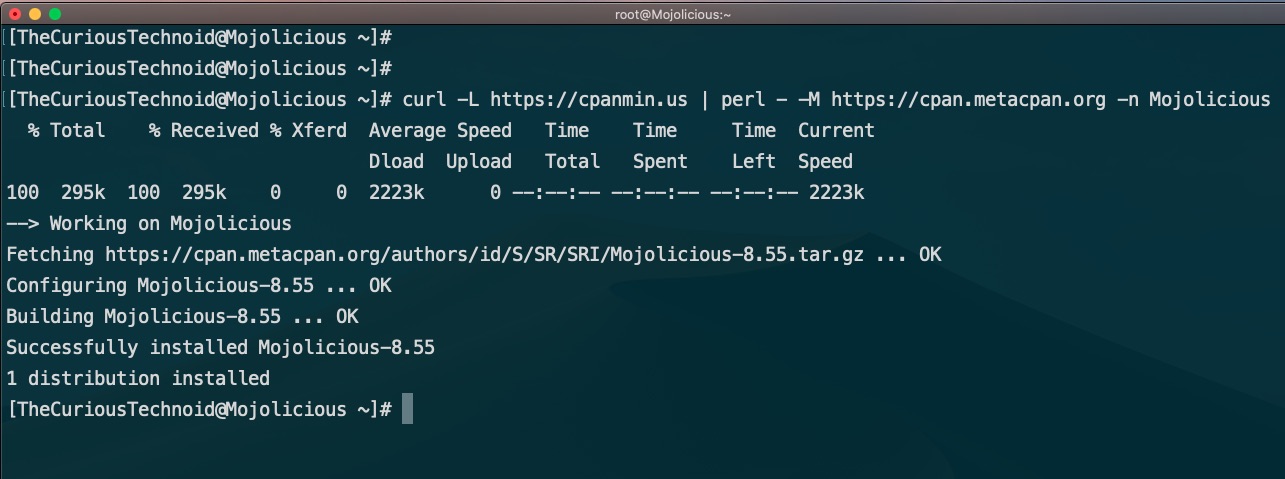
That’s all, this will install the full Mojolicious framework.
Method 2
Alternatively, you can also install it with traditional CPAN command similar to installing any Perl module:
cpanm MojoliciousOR
perl -MCPAN -e shell
install Mojolicious
This also installs full Mojolicious framework that required to build web applications.
Trust me when I say it, use the Method 1, it’s faster to install that way.
“Hello World” with Mojolicious::Lite
We have Mojolicious installed in our server by following the previous step, now lets go ahead and create a lite_app and try to bring the famous “Hello World” page live in that server.
You can create the lite_app using the below command. lite_app are usually used for simple projects involving probably a single page. Let us create a lite_app called hellomojo using the command:
mojo generate lite_app hellomojo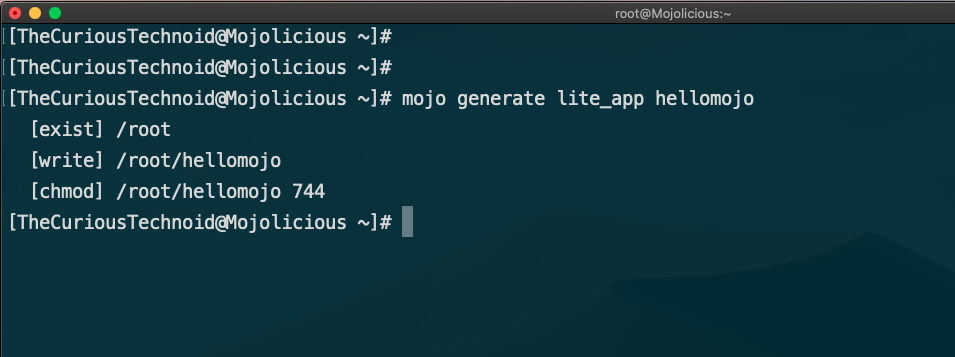
The above command will create a file called hellomojo in your current directory:
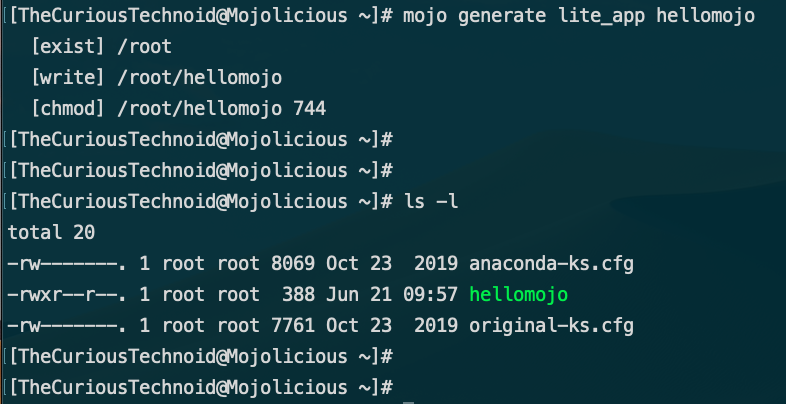
The hellomojo file created is a working sample webpage. You can start building your project on top of this file. The contents of the file will look something like this:
#!/usr/bin/env perl
use Mojolicious::Lite;

get '/' => sub {
  my $c = shift;
  $c->render(template => 'index');
};

app->start;
__DATA__

@@ index.html.ep
% layout 'default';
% title 'Welcome';
<h1>Welcome to the Mojolicious real-time web framework!</h1>

@@ layouts/default.html.ep
<!DOCTYPE html>
<html>
  <head><title><%= title %></title></head>
  <body><%= content %></body>
</html>
The sample file is easily understandable for anyone familiar with Perl. The contents after _DATA_ is treated as templates and layouts that the code uses to display the web content. We will see more about templates and layouts when we build a test project with full_app in future sessions.
For our “Hello World” page, we will change the contents of hellomojo to look like this:
#!/usr/bin/env perl
use Mojolicious::Lite;

get '/' => sub {
  my $c = shift;
  $c->render(template => 'index');
};

app->start;
__DATA__

@@ index.html.ep
% layout 'default';
% title 'Hello World Tutorial with Mojolicious';
<h1>Hello World!!</h1>

@@ layouts/default.html.ep
<!DOCTYPE html>
<html>
  <head><title><%= title %></title></head>
  <body><%= content %></body>
</html>
We only changed the below two lines in the file i.e., the window title and the content.
% title 'Hello World Tutorial with Mojolicious';
<h1>Hello World!!</h1>
Testing
We changed the default sample page’s content to add our “Hello World” text. Now let’s go ahead and test the page. We can test the pages created in Mojolicious using the development web server morbo. Lets not waste any time and go ahead and execute the below command to run our hellomojo web app:
morbo hellomojo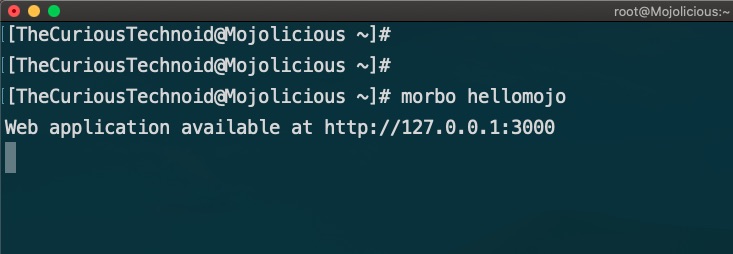
We can see that our page is running. morbo also gives us the URL with port where our website is running:

By default, morbo runs our pages on port 3000. Since morbo is a development web server, debugging is enabled by default and the web server runs in the foreground with debug messages. As we don’t see any errors on the terminal, the page looks fine.
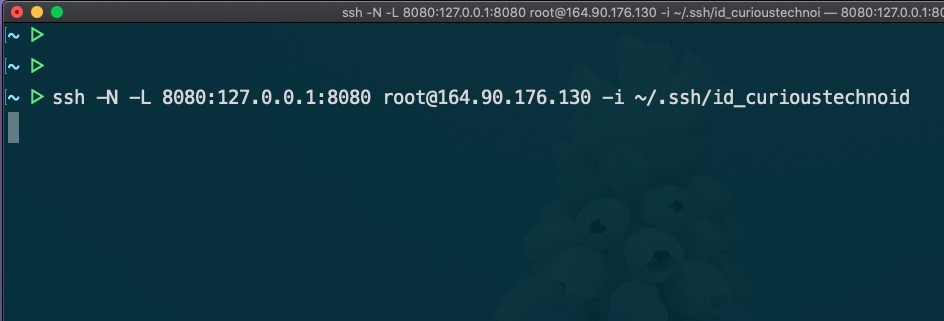
We won’t be able to access the webpage from the local Desktop since port 3000 will not be open in the server. Either we open the port in the firewall, or use SSH Tunneling. I prefer SSH Tunneling, read more about SSH Tunneling here.
Let us go ahead and start a SSH Tunnel to our server from the local Desktop using SSH Keys:
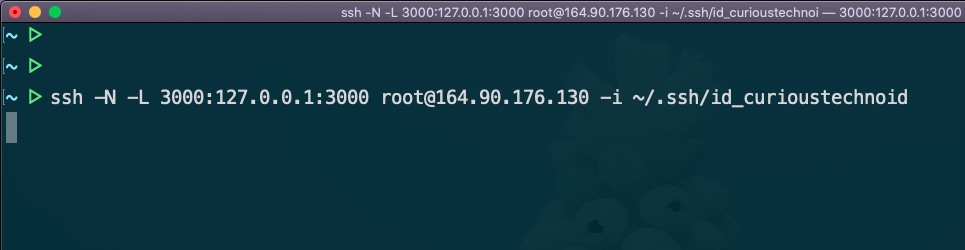
Now that the SSH Tunnel is active, lets go ahead and check our page from our browser using the server’s localhost IP(since SSH Tunnel is running) and morbo’s port(3000): http://127.0.0.1:3000
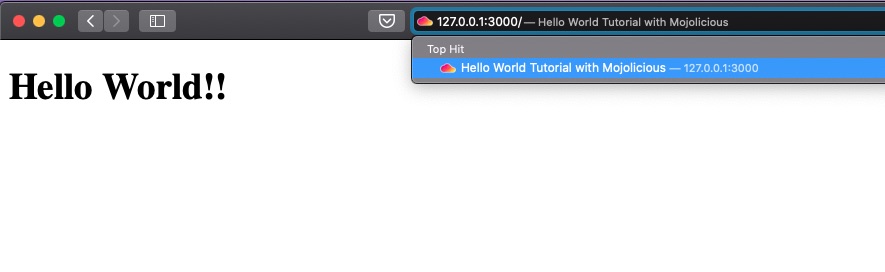
Success!! We have a working “Hello World” page ready to be deployed.
Deployment
Now that we tested and made sure that our “Hello World” page is working fine, we will deploy it in the server so that it runs all the time. There are different production web servers which gets shipped with Mojolicious (you can read more about it here), I use hypnotoad – ALL GLORY TO THE HYPNOTOAD!. It’s a recommended production grade web server to run Mojolicious web apps.
The command to run your page using hypnotoad is similar to morbo:
hypnotoad hellomojo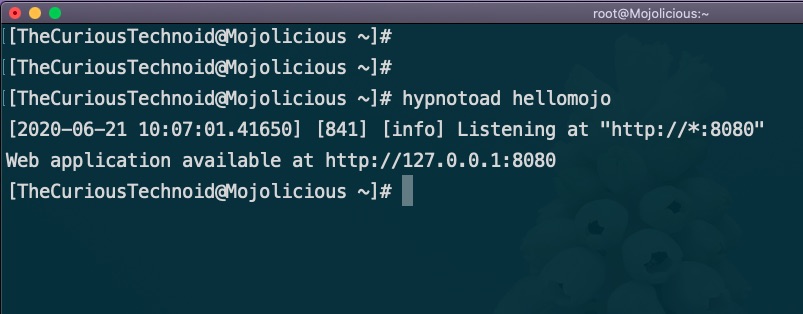
hypnotoad by default runs on port 8080(which can be changed ofcourse) and runs in the background. Lets fire up the terminal and establish a new SSH Tunnel to our web server on port 8080 this time. Now we can access our “Hello World” page using the webserver’s local host IP(because we are connected with SSH Tunnel) on port 8080: http://127.0.0.1:8080
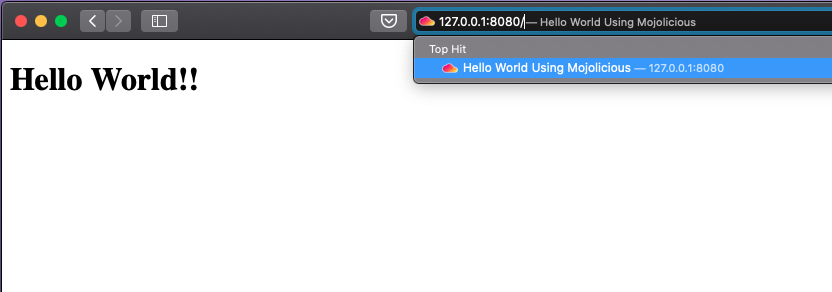
There we have it. Our “Hello World” webpage is running to serve the whole world with it’s simplicity and humbleness.
This was a little introduction as to how to build and deploy Mojolicious apps. In the next few sessions, we will build a test project using Mojolicious full_app covering templates, layouts, session management and database connections. Stay tuned.
I strongly suggest you to go through the video tutorials in this website called the MojoCasts. You can find tremendously useful tutorials on Mojolicious in that website. You can also check this informative tutorial written by Ashutosh in dev.to.