We have reached the last part of Mojolicious series. We have so far built a new project with Mojolicious full_app, created a home page for our website, then we looked at layouts & templates, and finally ended our last article with session management. In this session we will cover database management, which is one of the important functionalities when building a website.

The main functionality of our test case website that we are working on from part 1 of Mojolicious series is for registered users to be able to publish their testimonials in the website. To achieve that, we need to follow the below steps:
- Create Database Components
- Create Testimonials Page Template
- Database Connectivity Logic
- Verification
- Deploy to Production
Create Database Components
The testimonials entered by the users needs to be stored in the database so that all the testimonials entered by all the users is visible to everyone. We will use MariaDB database to store our testimonial table. First, we will create a MariaDB database called tct_mojo_db by logging in as root user:
mysql -u root -pCREATE database tct_mojo_db;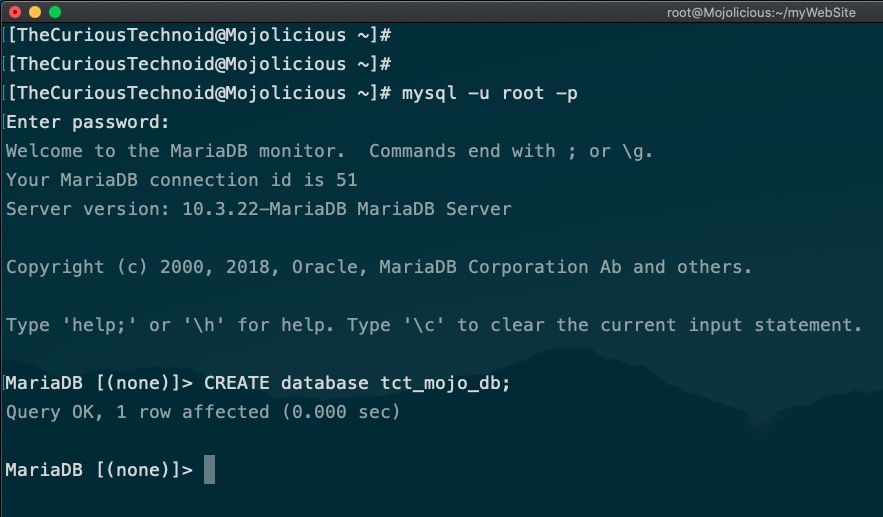
Then we will create a database user called demo and give it all the privileges to the database tct_mojo_db
CREATE USER 'demo'@'localhost' IDENTIFIED BY 'welcome123';

GRANT ALL PRIVILEGES ON tct_mojo_db.* TO 'demo'@'localhost';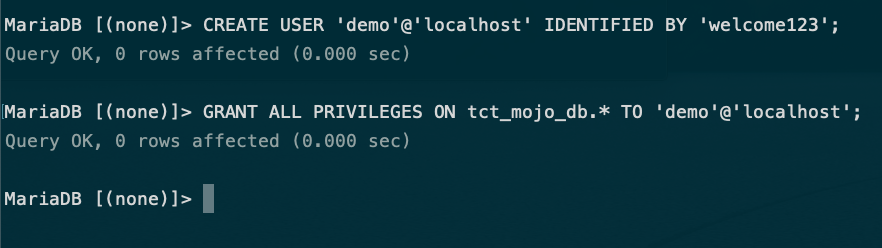
Finally we login as the new user(demo) and create the table tct_mojo_testimonials in our new database tct_mojo_db
mysql -u demo -puse tct_mojo_db;
CREATE TABLE IF NOT EXISTS tct_mojo_testimonials (
id INT(20) NOT NULL AUTO_INCREMENT,
published_by VARCHAR(560) NOT NULL,
published_on TIMESTAMP NOT NULL DEFAULT CURRENT_TIMESTAMP,
testimonial VARCHAR(32000) NOT NULL,
PRIMARY KEY (id)
) ENGINE=InnoDB;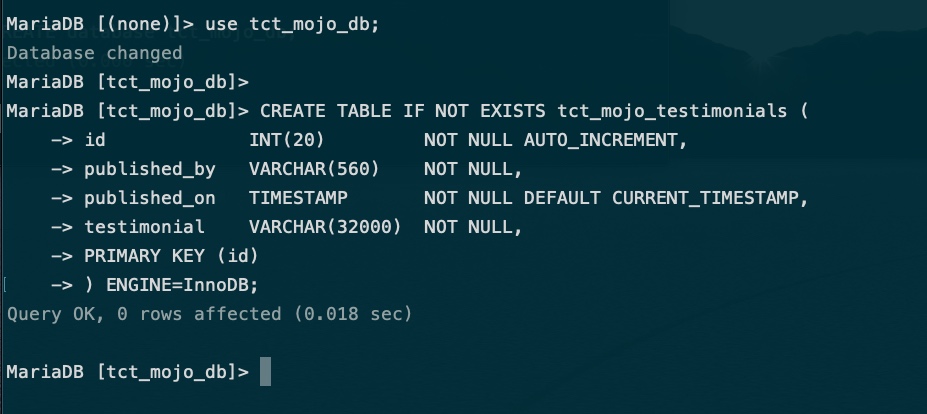
We will store the testimonials published by the users in the above database table. We have all the database related components in place for your project.
Create Testimonials Page Template
We need a new page template where users can publish their testimonials and view the testimonials of others. We will have a single page which does both. The first section of the page will be a html form which registered users can use to provide their testimonials and we will have a section below which will have all the testimonials given by everyone.
Let us go ahead and create a new template called: managetestimonials.html.ep in our templates folder: myWebSite/templates/myTemplates/ with the below content:
% layout 'master';
% title 'View Testimonials';
<a href="/">Home</a>
<a href="/logout">Log Out</a>
<h1><%= $msg %></h1>
<center>
<form action="/testimonials" method="post">
<textarea id="userReview" name="userReview" rows="8" cols="50">Please enter your testimonial here</textarea></br>
<input type="reset" value="Clear" />
<input type="submit" value="Publish">
</form>
</center>
<table width=100% align=center border=1 cellspacing=0 cellpadding=0>
<tr>
<th>Testimonials</th>
</tr>
<%== $alltestimonials %>
</table>
</body>
</html>We are referring to a perl variable $alltestimonials in the template code, this will have the existing testimonials from database in HTML format. We will set this value in our controller after getting them from database.
Database Connectivity Logic
Now that we have the new page template ready, time for us to add the logic to handle database operations. In order to achieve that we need to make the following changes to our project:
- Update DB credentials in myWebSite.conf file
- Add DB handler and logic to handle new route
- Create DB Modeller for database operations
- Change Controller logic to handle DB operations
myWebSite.conf
We need to update our conf file to include database credentials. We will add the database connectivity in the below format:
mysql => 'mysql://dbusername:dbpassword@localhost/databasename'So our updated myWebSite.conf file will look like this:
{
  secrets => ['8c285c2b2f9ce11c46ee322d52179ac32be6d42a'],
  mysql => 'mysql://demo:welcome123@localhost/tct_mojo_db'
}
DB Handler
We have DB connections in place. Now let us create a helper in our main library(myWebSite.pm) which will be used as a handle to our database. This can be used my our modeller and controller to access the database.
Database helpers can be created using the below statement:
# Invoking Database handle
$self->helper(mysql =>
sub { state $mysql = Mojo::mysql->new(shift->config('mysql')) });

$self->helper(dbhandle =>
sub { state $vikidb = myWebSite::Model::Database->new(mysql => shift->mysql) });
We will also add the below routes to handle the new testimonial page action using :
$authorized->get('/testimonials')->to('CustomController#loadTestimonials');
$authorized->post('/testimonials')->to('CustomController#saveTestimonial');
If you remember from our previous session, the $authorized handle helps us in making sure that only logged in users can access the above calls since these statements are called after the under statement.
Do not forget to import the module use Mojo::mysql; in your main library. If Mojo::mysql is not installed, go ahead and install the perl module.
We will also import our database modeller in our main library: use myWebSite::Model::Database;. This does not exist yet, we will be creating this modeller in the next section.
Once all the change are done, your main library file myWebSite.pm should look something like this.
DB Modeller
Next we will be creating a database modeller which will have the logic to query the testimonial data and insert any newly published testimonial. We will create the modeller inside our lib directory using the command:
mkdir lib/myWebSite/Model

touch lib/myWebSite/Model/Database.pm
Let us now open the database modeller file and add the below content:
package myWebSite::Model::Database;
use Mojo::Base -base;

has 'mysql';

# Subroutine to get all the testimonials
sub fetch_all_testimonials{ shift->mysql->db->query('select * from tct_mojo_testimonials order by published_on desc')->hashes->to_array }

# Subroutine to insert the new testimonial to database
sub publish_testimonial{


   my ($self, $new_testimonial, $username) = @_;
   my $sql = 'insert into tct_mojo_testimonials(published_by,testimonial) values (?,?)';


   $self->mysql->db->query($sql, $username, $new_testimonial);

}


1;
We have 2 subroutine in our modeller, fetch_all_testimonials will fetch all the testimonials into an array of hashes and the second subroutine publish_testimonial inserts the newly published testimonials to the database. These are the only 2 database operation we require for your website.
Controller CustomController.pm Changes
We have our modeller in place that handles the DB operations, let us go ahead and add subroutines in our controller which calls these.
In the above section, we had added 2 new subroutine calls to our controller in the main library file: myWebSite.pm. Let us add the logic to those 2 subroutines in our existing controller: lib/myWebSite/Controller/CustomController.pm
loadTestimonials basically generates a HTML data of all the testimonials that are there in the database. The generated HTML data is passed as parameter to the template where it is rendered. It uses the fetch_all_testimonials subroutine from the DB modeller that we created above. In the section Create Testimonials Page Template above we had used the variable $alltestimonials to display the data, the value for it is being set in the below subroutine.
sub loadTestimonials{

    my $self = shift;
    my $all_testimonials_html;

    foreach my $all_testimonials (@{$self->dbhandle->fetch_all_testimonials})
    {
        $all_testimonials_html .= "
  <tr>
      <td>
          ".$all_testimonials->{testimonial}."</br></br>
          <div style='text-align: right;'><i>".$all_testimonials->{published_by}."</br>".$all_testimonials->{published_on}."</i></div>
     </td>
  </tr>";
    }
    $self->render(template => 'myTemplates/managetestimonials',msg => 'View Testimonials',alltestimonials => $all_testimonials_html);


}
saveTestimonial basically saves the newly created testimonial added by the registered users. It uses the publish_testimonial subroutine from the DB modeller that we created above.
sub saveTestimonial{

    my $self = shift;
    my $new_testimonial = $self->param('userReview');
    my $user = $self->session('username');

    $self->dbhandle->publish_testimonial($new_testimonial,$user);
    &loadTestimonials($self);
}
Once all the above changes are done, our CustomController.pm controller will look like this.
Verification
That’s about it, we have everything we need to start our web application. Let us start our web application using morbo webserver:
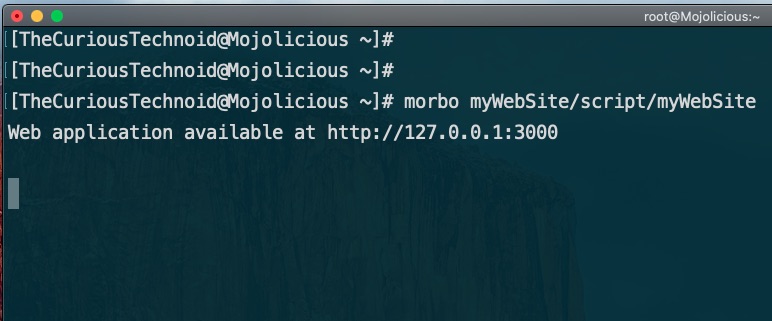
I have SSH Tunnel enabled, so let me access our website using localhost IP and port 3000.
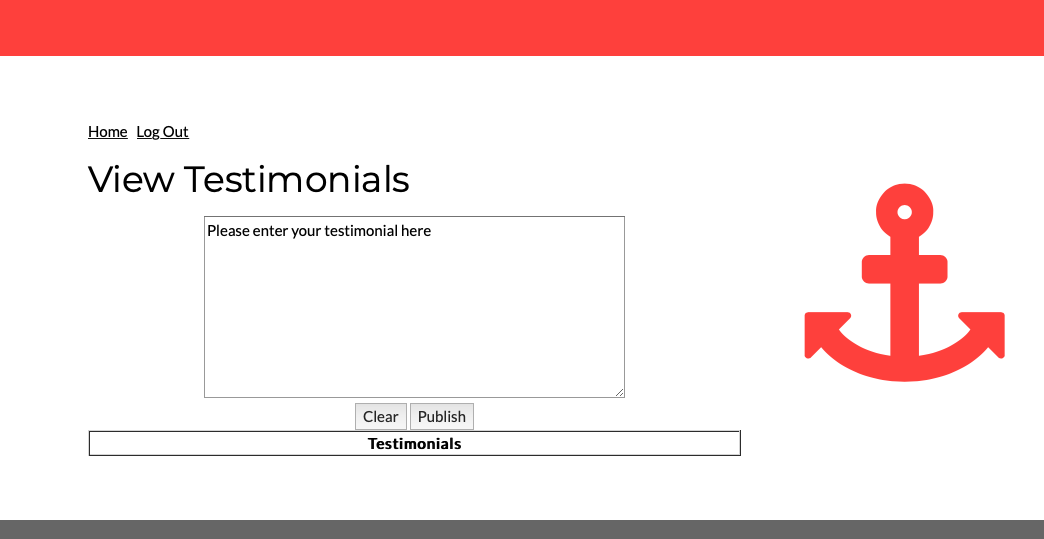
Once we login and navigate to Testimonials page, it should look like this:
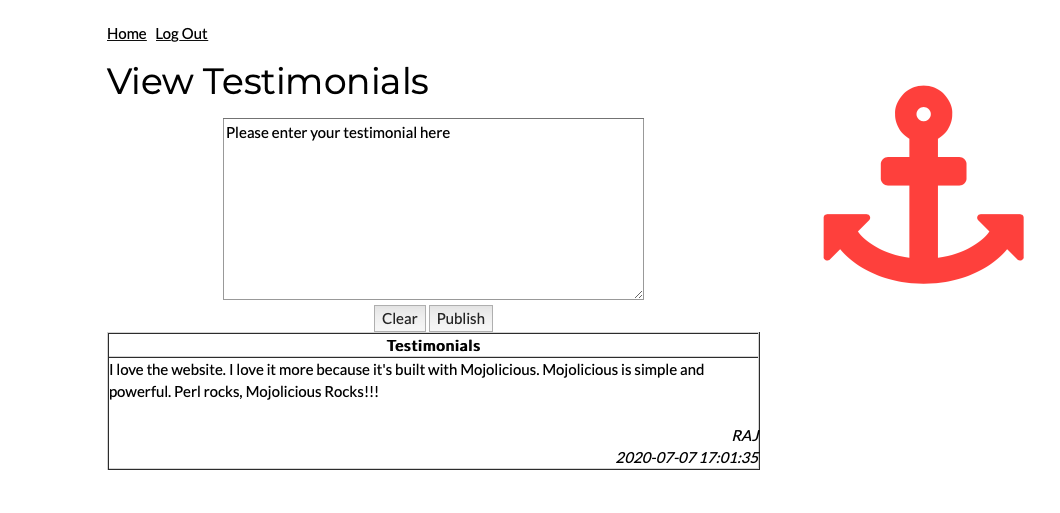
If we add any new testimonial, we can see it getting added in the table below:
We have successfully handled database connection in our website.
Deploy to Production
Now that we have a fully operational website with all the requirements met and tested, we can deploy our changes in production and start it to be available for everyone. To do that, as explained in the Mojolicious Introduction article, we will use the production webserver hypnotoad.
- Let’s tell
hypnotoadto run on port 80. To do that, we will update themyWebSite/myWebSite.conffile to look like this:
{
     secrets => ['8c285c2b2f9ce11c46ee322d52179ac32be6d42a'],
     mysql => 'mysql://demo:welcome123@localhost/tct_mojo_db',
     hypnotoad => {
          listen => ['http://*:80'],
          workers => 10
     }
}
We have also told hypnotoad to run 10 workers.
- Next we will open firewall ports 80 so that the website is accessible to everyone. I run Mojolicious on Fedora and use firewalld, I will run the below command to open the ports:
firewall-cmd --zone=public --permanent --add-port 80/tcp
firewall-cmd --reload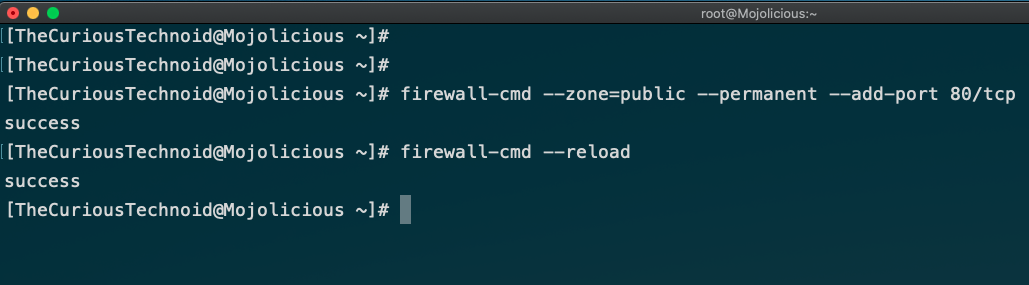
- Start the web application using
hypnotoadby using the command:
hypnotoad myWebSite/script/myWebSite
- Finally verify by accessing the website using your server IP (or domain name if you have one mapped):
Note: I recommend to use Apache Reverse Proxy along with hypnotoad for production deployments.
With that the Mojolicious tutorial comes to an end. We have successfully created a fully operational website covering major features of any website and made it available to general public. Hope the Mojolicious tutorial series were informative and helpful. Do let me know your thoughts and comments in the comment section below. You can find the entire source code of the testimonials project here. You can watch the entire Mojolicious series that we discussed in this blog series in my youtube channel. Keep visiting this blog for more technical tutorials.
Edits:
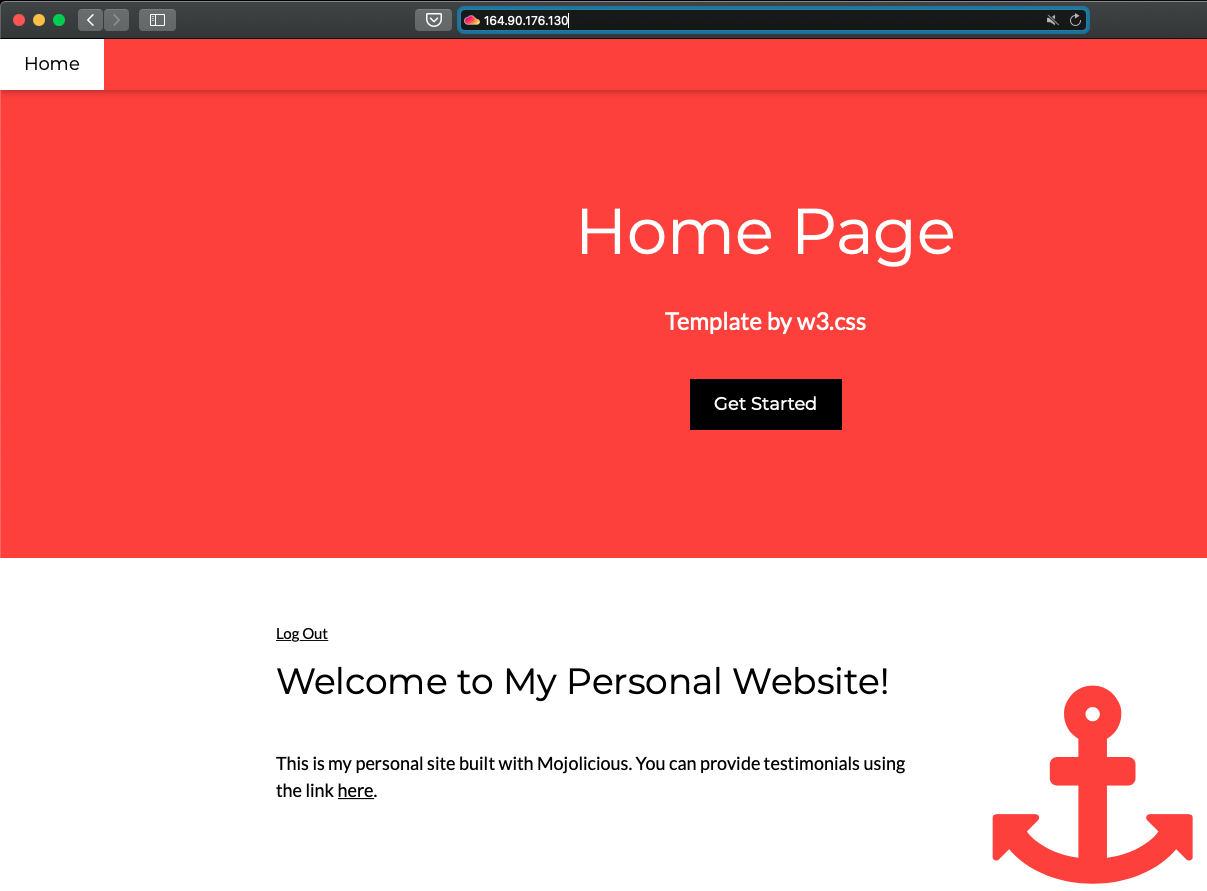
[13-May-2021] It so happened that I missed to mention about changing the homepage.html.ep file to point to the new testimonial route(/testimonials) that we created in the main library(myWebSite.pm). You just need to change the href tag in the homepage template to point to the new route and you should be good to go.
% layout 'master';
% title 'Home Page';
    <a href="/logout">Log Out</a>
      <h1><%= $msg %></h1>
      <h5 class="w3-padding-32">This is my personal site built with Mojolicious. You can provide testimonials using the link <a href="/testimonials">here</a>.
</h5>
Thanks to Jim for pointing this out.


You forgot to mention the change needed
in homepage.html.ep
Whoops! Not sure how i missed that. I have added edits mentioning about it at the end of the article. Thank you for pointing it out, appreciate your inputs 🙂
Nice to see good & updated tutorials about Perl/Mojolicious
Nice to see good & updated tutorials about Perl/Mojolicious,
Thanks.
I am glad you liked it.
This tutorial is great , even more approachable than the official tutorial. Thanks for your excellent work.
Add:
1) Maximium length of VARCHAR in Mariadb is 65535 , but if your datebase character code is UTF8, the limit is 21845 .
2) $all_testimonials_html in Subroutine loadTestimonials is easy to cause confusion, if don’t write carefully. Therefore, write each group of characters separately, which is more friendly to beginners.
Thanks for your kind words.
1. This article was written with english websites in mind, but good point.
2. You mean assign the value from the hash to a variable for clarity ? Well these articles are written with an intention to get you started with Mojolicious with ease. I guess after that, you would be writing better web apps than what is in this article 🙂
Cheers.
cool. but why is way to make registration, why is not implemented?
it would be nice to see how its should work. =)
The idea of these posts were to give you an idea as to how to work in Mojolicious. Are you stuck somewhere ? I can help if so.
Hello, publications are stored in the database, but in the example you suggested, user accounts are stored in CustomController.pm
sub validUserCheck {
my $self = shift;
# List of registered users
my %validUsers = ( “JANE” => “welcome123″
,”JILL” => “welcome234″
,”TOM” => “welcome345″
,”RAJ” => “test123″
,”RAM” => “digitalocean123”
);
it would be very interested to implement the registration page and have the credentials stored in the data base…
Actually, thank you very much for this article, it’s the only good article besides the official documentation that I could find where I could get information about Mojolicious.
Thank you for your kind words.
I moved to Django for a while and lately tinkering with VueJS + FastAPI. Been sometime since I used Mojolicious. I will try to see if I can create an article for this. If you are already working on it and are stuck somewhere, happy to weigh in.
You need to run the command
flush privileges;
as root before demo can log into mysql.
Login no longer works for me. I see these errors from morbo:
[2023-08-02 23:16:22.26368] [3241784] [error] [gloA8P2znTQh] Can’t use an undefined value as an ARRAY reference at /usr/local/share/perl5/5.32/Mojolicious/Controller.pm line 231.
[2023-08-02 23:16:22.26386] [3241784] [trace] [gloA8P2znTQh] Template “exception.development.html.ep” not found
[2023-08-02 23:16:22.26399] [3241784] [trace] [gloA8P2znTQh] Template “exception.html.ep” not found
[2023-08-02 23:16:22.26407] [3241784] [trace] [gloA8P2znTQh] Rendering cached template “mojo/debug.html.ep”
Mojo::Reactor::Poll: I/O watcher failed: A response has already been rendered at /usr/local/share/perl5/5.32/Mojolicious/Controller.pm line 154.
I didn’t touch any of the login code.
Hi Steve,
This looks like the same issue as I mentioned here:
https://thecurioustechnoid.com/mojolicious-part-3-session-management/#comment-307
Mojolicious version issue. You might have to tweak the code a little to make it work with latest version or get the same version of Mojolicious that I used, v9.22 for this code to work.
Hope it helps !
Thanks. I had already made the change Peter suggested while I was doing part 3. This error started as was doing part 4.
So, when I successfully log in, I see this from morbo:
[2023-08-03 17:50:32.45835] [3241784] [trace] [eR8itINlVUpS] POST “/login”
[2023-08-03 17:50:32.45887] [3241784] [trace] [eR8itINlVUpS] Routing to controller “myWebSite::Controller::CustomController” and action “validUserCheck”
[2023-08-03 17:50:32.45972] [3241784] [trace] [eR8itINlVUpS] Rendering cached template “myTemplates/homepage.html.ep”
[2023-08-03 17:50:32.46007] [3241784] [trace] [eR8itINlVUpS] Rendering cached template “layouts/master.html.ep”
[2023-08-03 17:50:32.46183] [3241784] [trace] [eR8itINlVUpS] 200 OK (0.003493s, 286.287/s)
[2023-08-03 17:50:32.46265] [3241784] [error] [eR8itINlVUpS] Can’t use an undefined value as an ARRAY reference at /usr/local/share/perl5/5.32/Mojolicious/Controller.pm line 231.
That line is inside a subroutine called signed_cookie.
my $sum = Digest::SHA::hmac_sha256_hex(“$name=$value”, $self->app->secrets->[0]);
So it looks like it was going to render homepage.html.ep then this error happened.
But now the I/O watcher error seems to have disappeared. Are you using Mojolicious v9.22 or higher version ?
Share your code please, I will have a look.
Sorry, the I/O watcher error is also there. Here’s a more complete capture:
[2023-08-04 22:51:45.24467] [3372701] [trace] [quBKk0KzFuuL] POST “/login”
[2023-08-04 22:51:45.24542] [3372701] [trace] [quBKk0KzFuuL] Routing to controller “myWebSite::Controller::CustomController” and action “validUserCheck”
[2023-08-04 22:51:45.24637] [3372701] [trace] [quBKk0KzFuuL] Rendering template “myTemplates/homepage.html.ep”
[2023-08-04 22:51:45.24813] [3372701] [trace] [quBKk0KzFuuL] Rendering cached template “layouts/master.html.ep”
[2023-08-04 22:51:45.24895] [3372701] [trace] [quBKk0KzFuuL] 200 OK (0.00429s, 233.100/s)
[2023-08-04 22:51:45.24986] [3372701] [error] [quBKk0KzFuuL] Can’t use an undefined value as an ARRAY reference at /usr/local/share/perl5/5.32/Mojolicious/Controller.pm line 231.
[2023-08-04 22:51:45.25005] [3372701] [trace] [quBKk0KzFuuL] Template “exception.development.html.ep” not found
[2023-08-04 22:51:45.25018] [3372701] [trace] [quBKk0KzFuuL] Template “exception.html.ep” not found
[2023-08-04 22:51:45.25027] [3372701] [trace] [quBKk0KzFuuL] Rendering cached template “mojo/debug.html.ep”
Mojo::Reactor::Poll: I/O watcher failed: A response has already been rendered at /usr/local/share/perl5/5.32/Mojolicious/Controller.pm line 154.
mojo version
CORE
Perl (v5.32.1, linux)
Mojolicious (9.33, Waffle)
Here’s the code in my CustomController.pm. Do you need to see anything else?
package myWebSite::Controller::CustomController;
use Mojo::Base ‘Mojolicious::Controller’, -signatures;
# This action will render a template
sub welcome ($self) {
# Render template “example/welcome.html.ep” with message
# $self->render(msg => ‘Welcome to the Mojolicious real-time web framework!’);
$self->render(template => ‘myTemplates/homepage’,
msg => ‘Welcome to my personal web site.’);
}
# Display the login page
sub displayLogin {
my $self = shift;
# if(alreadyLoggedIn($self))
# see comments in https://thecurioustechnoid.com/mojolicious-part-3-session-management/
# evidently, you can no longer render 2 things in one route. alreadyLoggedIn renders myTemplates/login
# if someone is not logged in, then this code also renders myTemplates/login if someone is not logged in.
# if we just check for the session here, we avoid the second render.
if($self->session(‘is_auth’))
{
# user already logged in. Senf the to the welcome page
welcome($self);
}
else
{
# user not logged in. Send them to login page
$self->render(template=> “myTemplates/login”, error_message=> “”);
}
}
sub validUserCheck {
my $self = shift;
# test/demo data
my %validUsers = (“JANE” => “welcome123″
,”JILL” => “welcome234″
,”TOM” => “welcome345″
,”RAJ” => “test123″
,”RAM” => “digitalocean123”
);
my $user = uc($self->param(‘username’));
my $password = $self->param(‘pass’);
if(exists($validUsers{$user}))
{
if($validUsers{$user} eq $password)
{
# create a session cookie
$self->session(is_auth => 1);
# store the username in the cookie
$self->session(username => $user);
# cookie expires in 10 minutes if no activity (how is this detected?)
$self->session(expiration => 600);
# direct the user to the home page
welcome($self);
}
else
{
# wrong password
$self->render(template=> “myTemplates/login”, error_message=> “Invalid password. Try again.”);
}
}
else
{
# user not found
$self->render(template=> “myTemplates/login”, error_message=> “User $user not found in this system.”);
}
}
# check if user is already logged in
sub alreadyLoggedIn {
my $self = shift;
return 1 if $self->session(‘is_auth’);
# user not logged in. Send them to login page
$self->render(template=> “myTemplates/login”, error_message=> “You must log in to use this web site”);
return 0;
}
# log out
sub logout {
my $self = shift;
# end the session by expiring the cookie in 1 second?
$self->session(expires => 1);
$self->render(template=> “myTemplates/logout”);
}
sub loadTestimonials{
my $self = shift;
my $all_testimonials_html;
foreach my $all_testimonials (@{$self->dbhandle->fetch_all_testimonials})
{
$all_testimonials_html .= ”
“.$all_testimonials->{testimonial}.”
“.$all_testimonials->{published_by}.””.$all_testimonials->{published_on}.”
“;
}
$self->render(template => ‘myTemplates/managetestimonials’,msg => ‘View Testimonials’,alltestimonials => $all_testimonials_html);
}
sub saveTestimonial{
my $self = shift;
my $new_testimonial = $self->param(‘userReview’);
my $user = $self->session(‘username’);
$self->dbhandle->publish_testimonial($new_testimonial,$user);
&loadTestimonials($self);
}
1;
Hi Steve,
Apologies for the delay.
It would help if you had kept the code in a notepad or something. Nevertheless I used the exact same code that you have pasted and tried with v9.33 and it seems to be working fine. Please find the screenshot below:
Can you give the entire source code so that I can try that ?
Thanks,
RC
How would I send you all of the code?
Can I include it as an attachment somehow? Share it via dropbox or something?
Thanks.
You can put it in GitHub repository and share the link with me. Dropbox will also work.
Thanks a lot, I was having issues accessing my database helper through the model and this fixed it 🙂 Very grateful for the article.
I am glad it did. Happy Coding !