Now that we have our Home Page built in the previous article, let’s extend our project from it. Our home page looks quite dull and boring, so let’s add some color to it. This can be achieved by Layouts and Templates in Mojolicious. To start with, what we need is a nice looking HTML template. Then we embed that template so that Mojolicious starts considering it to render our pages. Let us take it step by step. Firstly, how different are Templates and Layouts ?

Layouts are reusable skeleton of your website. This generally would have your header, logo, footer, menus, side bar etc
Templates are the dynamic content that you want to display based on different actions on the web portal. This is generally the content that needs to be inside the layout.
Download Template
To put it into action, let’s download a free HTML template from the internet. I downloaded one from w3 schools.
It looks like this:
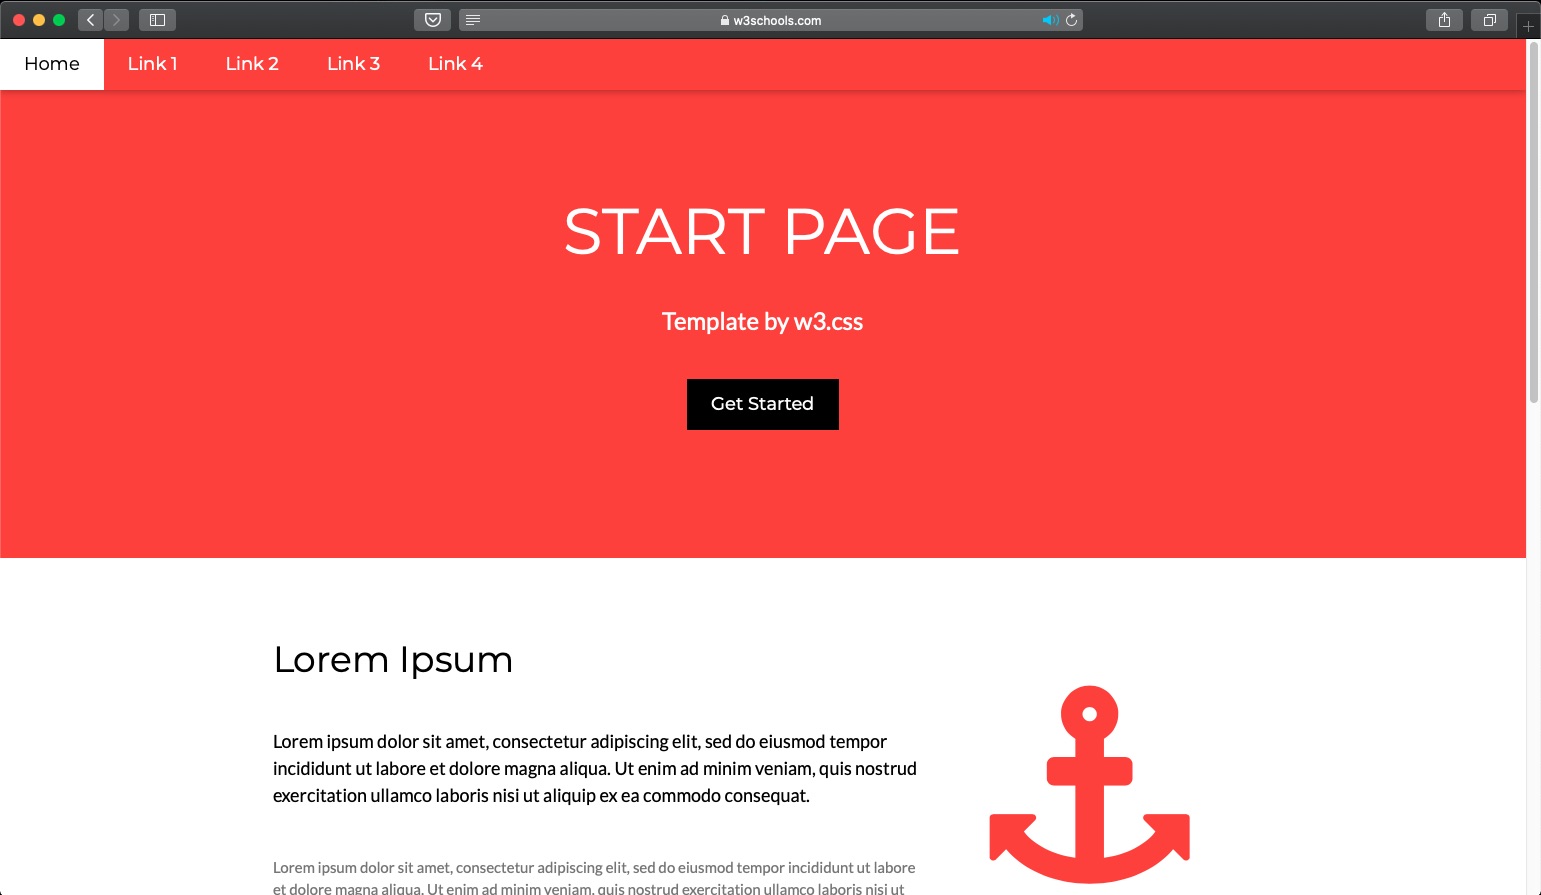
You can get the source code here.
Create a Layout
Let us make this HTML template as a layout in Mojolicious, so that we can use it across our pages. To do so, lets follow the below steps:
| 1. | Create a file called: myWebSite/templates/layouts/master.html.ep with the source code of the HTML we downloaded in the previous section. This will be our layout with name: master | |
| 2. | Remove the section which you think will not be static across the pages. I will comment the “Second Grid” section. I don’t mind all my website pages having the rest of the content from the downloaded HTML template. | |
| 3. | I will also change parts of “First Grid” section and add the line: <%= content %>. content is a Mojolicious helper which will have static or dynamic data mentioned in the Mojolicious template (which we will see in the next section). |
|
| 4. | Also instead of static title, replace the title with <%= title %>. You can dynamically change the title value from the Mojolicious template. |
|
| 5. | Also, I replaced the text “START PAGE” with title helper: <%= title %> |
|
| 6. | Since we only have home page now, I will also comment all the other menu links: Link 1, Link 2 etc. |
We will finally have the layout file, master.html.ep which looks like this. You can check comments by The Curious Technoid to know the changes I did to the original file.
This will be our layout which is our website skeleton and will be used across our website. We will only change the content and title dynamically using Mojolicious templates.
Create Templates
Now that we have our website layout in place, we will create templates from where these layouts gets called from. If you have gone through the previous article, you have already created a new template called: myWebSite/templates/myTemplates/homepage.html.ep which looks like this:
% layout 'default';
% title 'Home Page';
<h2><%= $msg %></h2>
<p> This is my personal site built with Mojolicious. You can provide testimonials using the link <a href="#">here</a>.
</p>
Lets change it to call our newly created layout master.html.ep. We also add our “content” using the same HTML tag and CSS Class which was their in the original HTML source:
% layout 'master';
% title 'Home Page';
<h1><%= $msg %></h1>
<h5 class="w3-padding-32"> This is my personal site built with Mojolicious. You can provide testimonials using the link <a href="#">here</a>.
</h5>
% layout 'master'; tells Mojolicious which layout to use% title 'Home Page'; – the title helper which gets replaced in layout
Any HTML data you enter in the template will be displayed in the <%= content %> section of the layout.
Verify Changes
Now that we have our templates and layouts in place. Lets start our web application using morbo:
morbo myWebSite/script/myWebSite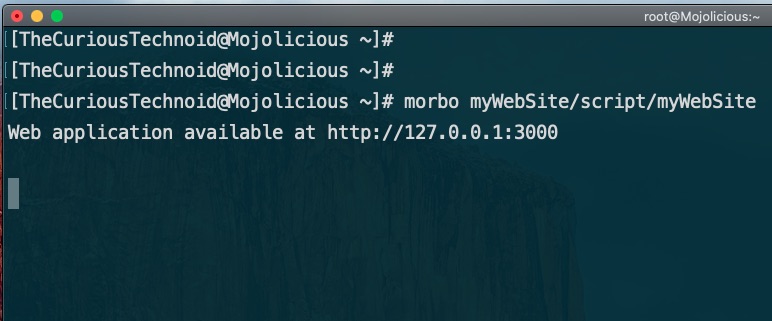
Since we have SSH Tunnel enabled as usual, we will check our website using local host and port 3000:
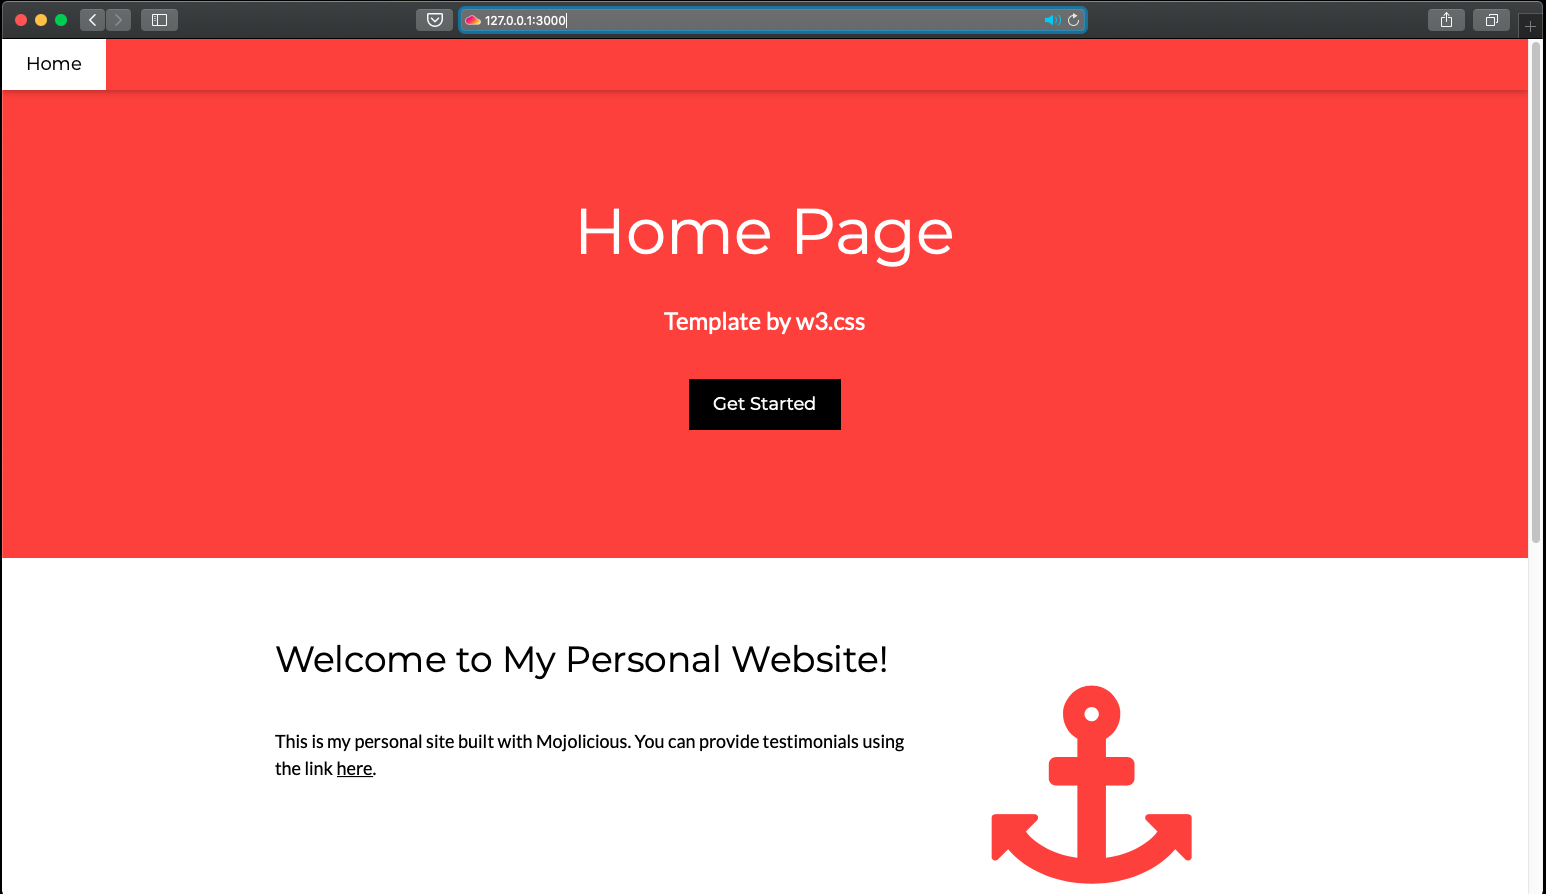
Our website doesn’t look that bad now, does it.
In the next article, we will make our website accessible by only registered users using sessions and cookies.