
SSH Keys are one of the safest ways to connect to your server. It involves public-private key pair which authenticates the user to login to the server. The private key is installed in the local Desktop / Server, whereas the public key in installed in the server to which you wish to connect.

Today we will cover the below topics which will help you start using SSH keys right away:
- Generation of SSH Keys
- Installation of SSH Keys
- Connecting using SSH Keys
- SSH Config File
How to generate SSH Keys
We can generate the SSH Key pair using the ssh-keygen command. You have the option to choose from 4 encryption algorithms that ssh-keygen supports as of this writing. The 4 algorithms are rsa, dsa , ecdsa and ed25519. I always use ecdsa which is a strong algorithm that meets modern security standards. It is highly recommended you generate the SSH key pair using a passphrase. This ensures that, if someone gets their hand on your private key, they wouldn’t be able to use it without the passphrase.
In your local Desktop / Server you can generate SSH Key pair using the below command:
ssh-keygen -t ecdsaWhen you the above command is executed, you will be prompted with the below (optional) inputs:
- Enter file in which to save the key (/root/.ssh/id_ecdsa): – If you don’t pass any value to this, the key-pair will be created in the
~/.sshfolder by default, with the name id_ecdsa. You can always enter your preferred name to override this. - Enter passphrase (empty for no passphrase): – This accept empty sting as input if you don’t wish to use a passphrase. However, I strongly recommend you provide a passphrase so that no-one else will be able to access your private key.
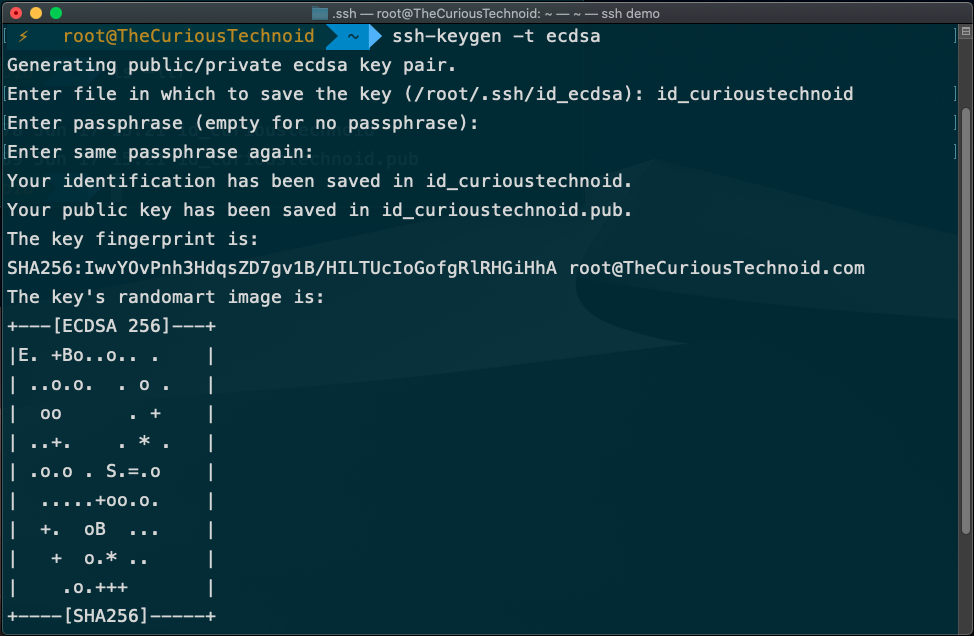
Once the keys are generated, you will find two files created by ssh-keygen, in my case they are: id_curioustechnoid and id_curioustechnoid.pub
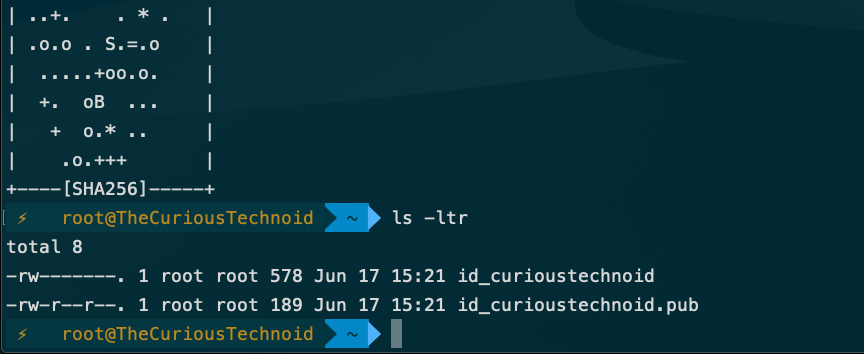
id_curioustechnoid : This is your private key
id_curioustechnoid.pub : This is your public key which we need to install in the remote server
How to install SSH Keys
Now that the SSH Keys are generated, let’s go ahead and install them.
1. Install the private key in your local Desktop / Server
Installation of your private key in your local Desktop / Server is pretty straightforward and easy. You just copy your private key to ~/.ssh directory (if your key is not already there):
First create the ~/.ssh directory if it doesn’t exist:
mkdir ~/.ssh
chmod 700 ~/.ssh
Followed by moving the private key to that directory
mv id_curioustechnoid ~/.ssh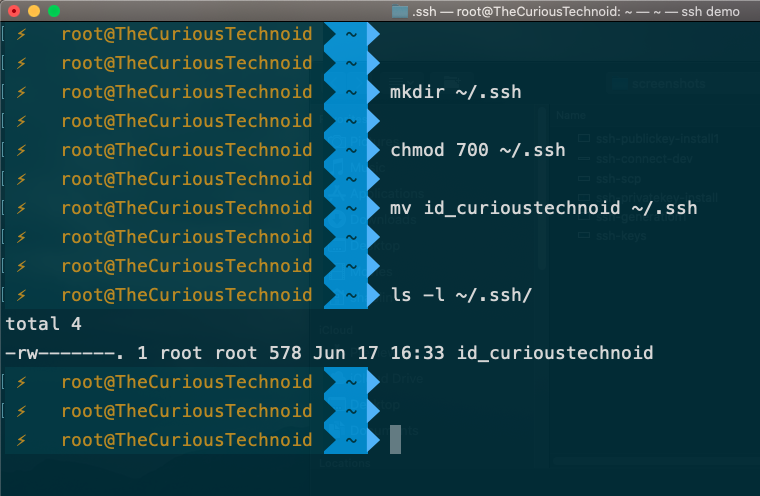
That’s it! The private key is now installed in your local Desktop or Server.
You can keep your private key in any directory that you want, it’s a good practice to keep them in ~/.ssh folder in your home directory. If you run the ssh-keygen command using all default values, your public-private key pair will be created in ~/.ssh directory.
2. Install the public key in the remote server
Let’s see how we can install the public key in the remote server to which you wish to connect.
Firstly, transfer the public key that you created to your server using your favourite sftp tool. Since I am connected to a headless demo server without GUI I will use the good old scp command for this purpose. I will be transferring the key to my development.local server to which I will be connecting to.
scp id_curioustechnoid.pub guest@development.local:~/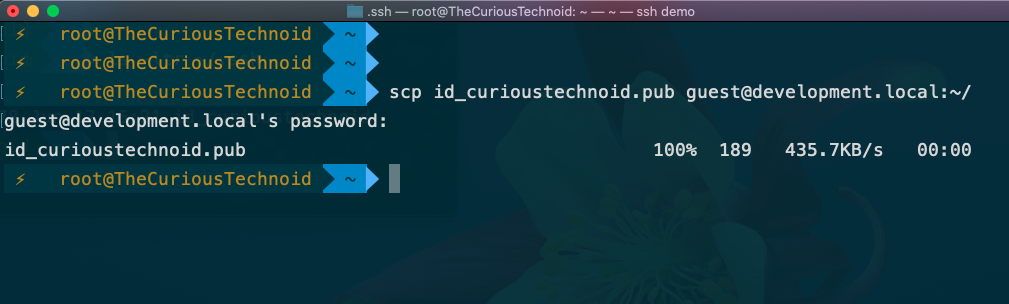
What this will do is copy the public key that we just created to my development server and place the file in the home directory.
Next we login to the development server using our username/password:

After logging in, append your public key to the SSH authorization file: ~/.ssh/authorized_keys
cat id_curioustechnoid.pub >> ~/.ssh/authorized_keys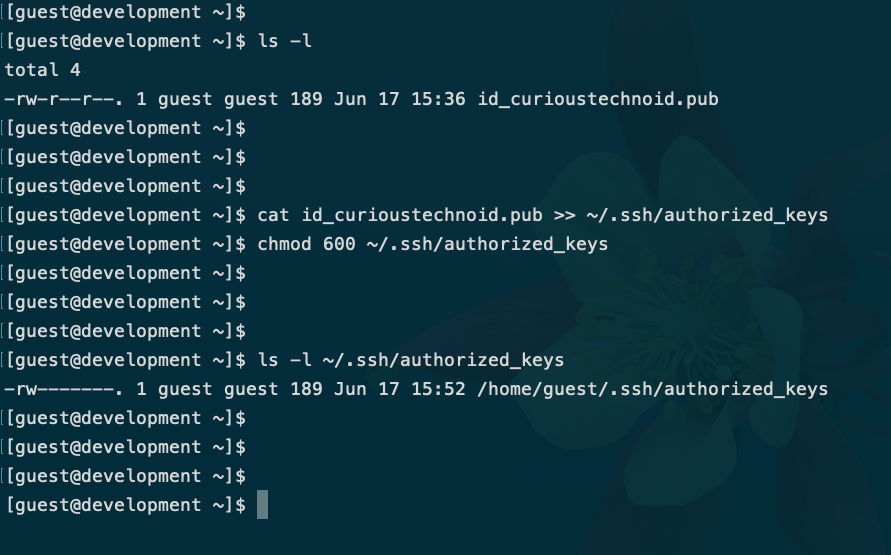
Don’t forget to remove the public key file from home directory by running: rm ~/id_curioustechnoid.pub
There you have it, public key successfully installed in the server.
How to connect using SSH Keys
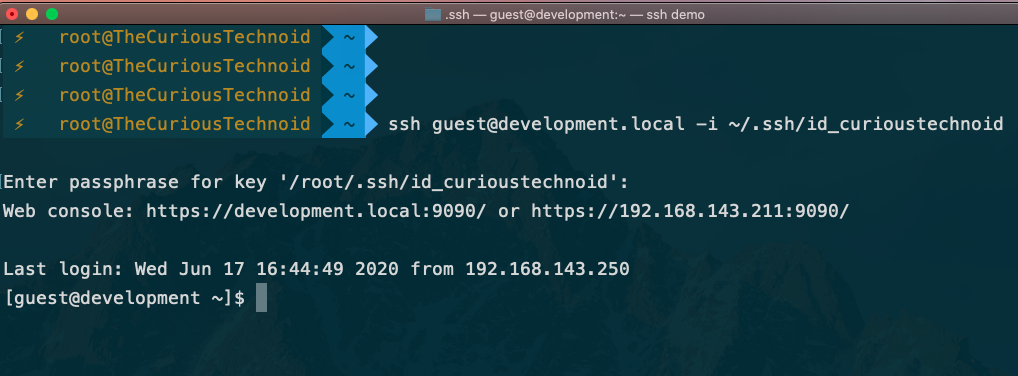
The above steps ensures that the SSH setup is in place, now we can go ahead and connect to our server using the SSH Keys. The below option(-i) tells SSH to use the private key that we just created to connect to development.local server:
ssh guest@development.local -i ~/.ssh/id_curioustechnoidYou will be prompted to enter the passphrase on the screen. Soon after we do, we should be able to successfully connect to the development server.
SSH config file
If you connect to multiple servers like me, managing the keys becomes cumbersome and hard to remember. That’s where SSH config file comes in handy. It’s a master configuration file where you can list all your SSH connections and it’s respective keys. This makes accessing any server more convenient.
Let’s go ahead and create a config file and enter the details of our development server:
1. SSH by default recognizes the config file under ~/.ssh directory.
Let us create the SSH config file using the below command and give it the correct permission(600):
touch ~/.ssh/config
chmod 600 ~/.ssh/config
2. Enter your SSH details in the below format
Open the file ~/.ssh/config using your favorite editor:
Host dev
HostName development.local
User guest
IdentityFile ~/.ssh/id_curioustechnoid
Host other-server
HostName 192.168.1.232
User root
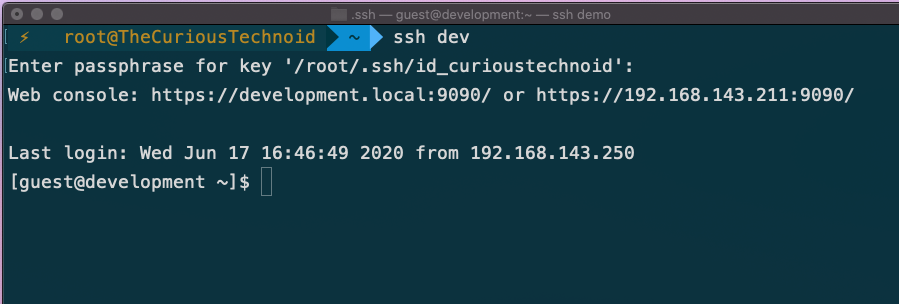
IdentityFile ~/.ssh/id_ecdsaYou can keep adding any number of server details in this file. Once the server details are added, connecting to the server is a breeze:
ssh devThis will prompt you for the passphrase. You enter the passphrase and you will be logged into the development server. Pretty handy isn’t it.
There you go, we just created, configured and installed SSH keys.